Defending a nil bid with high cards in Spades
A nil bid can be the key to winning at Spades. But for a nil bid to succeed, the nil bidder's partner has to defend it well. This example shows how a promising nil bid can lead to a loss when the defense is poor.
East was the dealer. North bid 4 first. West bid nil without knowing East's bid. This can be risky. Suppose East ends up bidding 1. That's a sign of a weak hand, which is usually a bad hand for defending a nil.
In fact, though, East bids 4. And West has good reason to bid nil. West's hand is pretty poor, with mostly low cards that are unlikely to take a trick. Also, the scores are nearly tied and the game is close to the end. A successful nil might win the game for the East-West team.
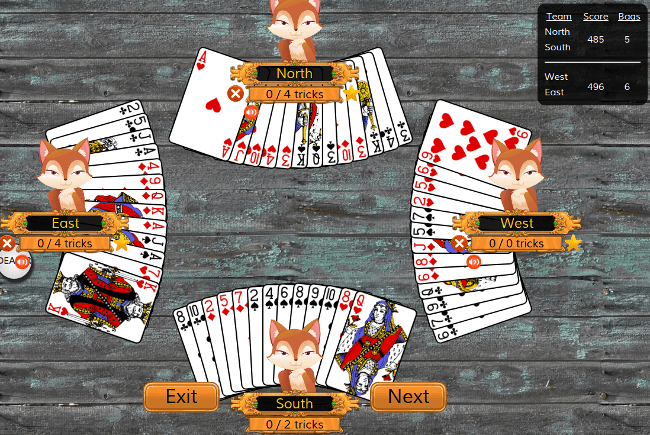
Unfortunately (in my humble opinion), East didn't do a good job defending this nil. The screenshot above shows the hand before the first trick. You can watch the hand play out in this YouTube video.
North starts the play by leading an Ace. I can't explain this one. It helps the other team by letting West get rid of their highest heart.
North leads the next trick with a low diamond. This is more like it. It's a clear attempt to force West to take a trick and set the nil. East takes the trick with the highest diamond, the Ace. This is East's first mistake. It would have been wiser to take the trick with the 9 of Diamonds, the lowest diamond that would win it. Generally, if you have the high cards in a suit, save them for leading when you're defending a nil. When you take a trick, use the lowest card that can take it.
East then leads the King of Hearts. This is fine. The Ace is known to be out of play, so East will take this trick unless an opponent trumps it with a spade. Either way, it lets West get rid of their second-highest heart.
East then leads the Ace of Clubs. This isn't completely wrong, but it's not what I would do. If I were East, I'd lead diamonds whenever I had the lead. East started with 5 diamonds, so East is long in diamonds. If I keep playing diamonds, two good things can happen for my partner. First, I might use up all the diamonds in my partner's hand. Then they can start discarding their high cards in other suits on my diamond tricks. Second, if North trumps my diamond tricks (quite likely), West may be able to discard a spade under North's spade, as long as West is out of diamonds.
In a case like this, the nil defender's goal is to keep the lead if possible. They lead their long suit again and again until their partner runs out of it and starts discarding cards from other suits.
Unfortunately, East now makes the mistake of leading the Jack of Clubs. There are two problems with this. First, after the Jack, East has no more high clubs to defend the nil with. Second, the King of Clubs hasn't been played yet, so this move invites the opponents to take the lead. Here, that's a bad thing. When the opponents are leading, you don't control how your partner is attacked. You want to stay in control of which suit is led, bleed your partner dry of cards in your long suit, and give your partner as many chances as possible to discard their high cards in other suits.
North takes the Jack of Clubs with the King and then flushes out West's weakness in clubs. South is void in clubs, so they can stay out of the fray. East has nothing left to defend with, so West takes the trick. The nil is set. It might have been set anyway, but East and West would have had a better chance with a different defense.
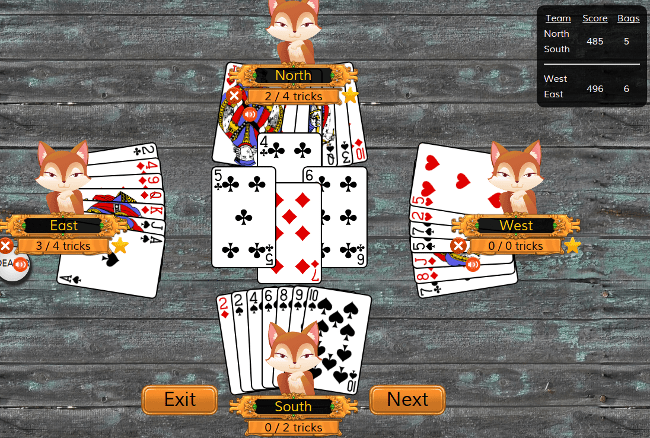
At this point, the East-West team can't win the game in this hand. To avoid losing the game, they'd have to give the opponents 5 bags to roll them or else set them. In fact, it's now mathematically impossible to roll the opponents. Even if North and South take all 7 remaining tricks, they still won't have enough bags to roll. And East and West don't have the cards to set their opponents. They've lost the game!
Nil bids
- A good nil hand with Aces
- A good nil hand with a void
- Defending a nil bid with high cards Reading
- When a nil bid is too risky
Playing as a team